728x90
반응형
1. PowerShell 로 고정IP 할당하기
*관리자 모드로 PowerShell을 실행하자.
먼저 코드를 보자.
$NetworkInterfaceName = "ethernet"	# 네트워크 인터페이스 이름
$ipAddress = "192.168.55.121"		# IP주소
$subnet = 24				# 서브넷 마스크
$gateway = "192.168.55.1"		# 게이트웨이 IP
$dns1 = "8.8.8.8"			# DNS 주소1
$dns2 = "1.1.1.1"			# DNS 주소2

$val = Get-NetIPAddress `
    | Where-Object {$_.InterfaceAlias -eq $NetworkInterfaceName } `
    | Select-Object "InterfaceIndex"

$index = $val[($val.Count-1)].InterfaceIndex

# IP 설정
New-NetIPAddress `
    -InterfaceIndex $index `
    -IPAddress $ipAddress `
    -PrefixLength $subnet `
    -DefaultGateway $gateway

# DNS 설정
Set-DnsClientServerAddress `
    -InterfaceIndex $index `
    -ServerAddresses $dns1, $dns2
*네트워크인터페이스의 이름은 대부분 '이더넷' 또는 'Ethernet'일 것이다. 혹시 다른 것이라면 변경하자.
Network Interface 의 번호를 먼저 알아내서, 해당 인터페이스에 아이피를 부여하는 방법이다.
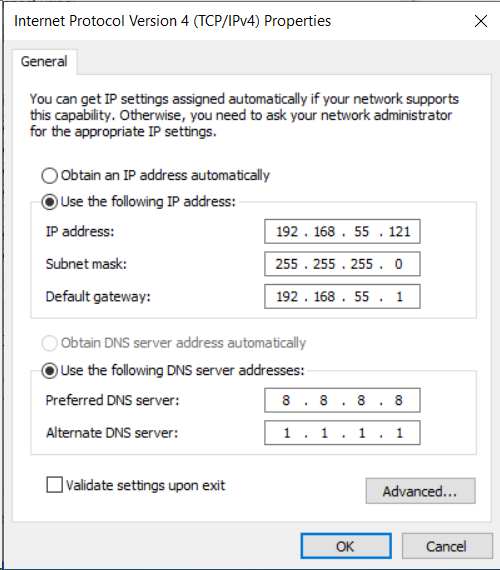
IP가 잘 바뀐 것을 확인할 수 있다.
2. PowerShell 로 동적, DHCP 변경하기
*관리자 모드로 PowerShell 을 실행하자.
$NetworkInterfaceName = "Ethernet"

# Network Interface 선택
$val = Get-NetIPAddress `
    | Where-Object {$_.InterfaceAlias -eq $NetworkInterfaceName } `
    | Select-Object "InterfaceIndex"

$index = $val[($val.Count-1)].InterfaceIndex

# Default Gateway 삭제
Remove-NetRoute -InterfaceIndex $index -Confirm:$false

# IP주소 삭제 및 DHCP 로 변경
Set-NetIPInterface `
    -InterfaceIndex $index `
    -DHCP Enabled

# DNS를 자동으로 변경
Set-DnsClientServerAddress -InterfaceIndex $index -ResetServerAddresses
*네트워크인터페이스의 이름은 대부분 '이더넷' 또는 'Ethernet'일 것이다. 혹시 다른 것이라면 변경하자.
(참고자료)
728x90
반응형
'Windows > PowerShell' 카테고리의 다른 글
| PowerShell | 방화벽 규칙 추가하여 포트 열기 (0) | 2022.09.28 |
|---|---|
| PowerShell | (관리자) 계정 비활성화/활성화 (0) | 2022.09.21 |
| PowerShell | 설치된 프로그램 삭제, 프로그램 삭제하기 (0) | 2022.08.09 |
| PowerShell | 설치된 프로그램 목록 보기(레지스트리, WmiObject ...) (0) | 2022.08.08 |
| PowerShell | Write-Host, Write-Output 차이 (0) | 2022.07.07 |


댓글